Background
It was the tell tale sign, revs go up but the car doesn't pick up speed. The clutch needs to be replaced
Products
After reserching forums and groups I settled on the parts list below:
ACT TC2-HDSS Clutch
Toyota OEM Throwout Bearing
Fidanza Lightweight Flywheel
ARP Flywheel Bolts
OEM Rear Main Seal
OEM Axle Seals
Removing the transmission
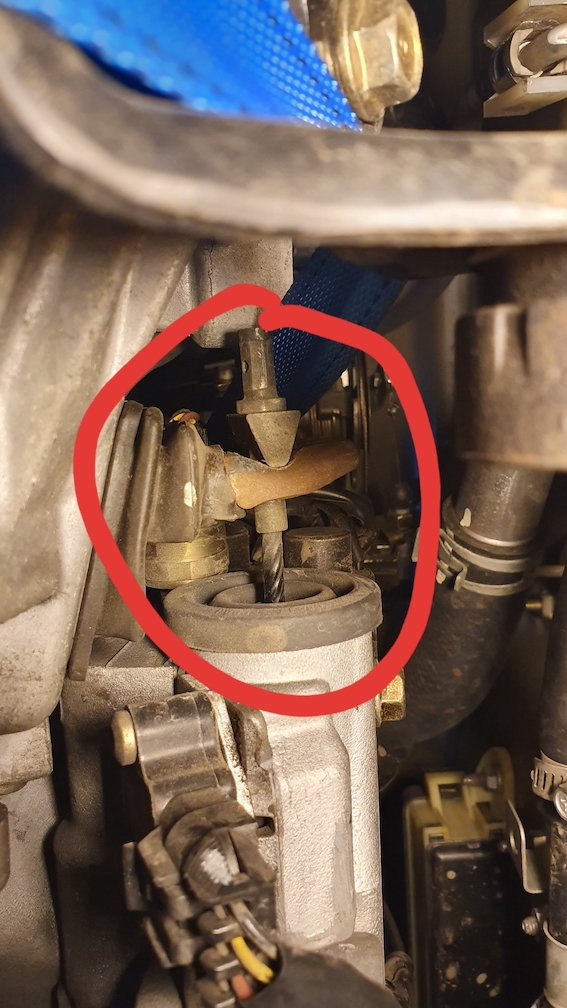
Before taking anything apart note the resting position of your clutch fork
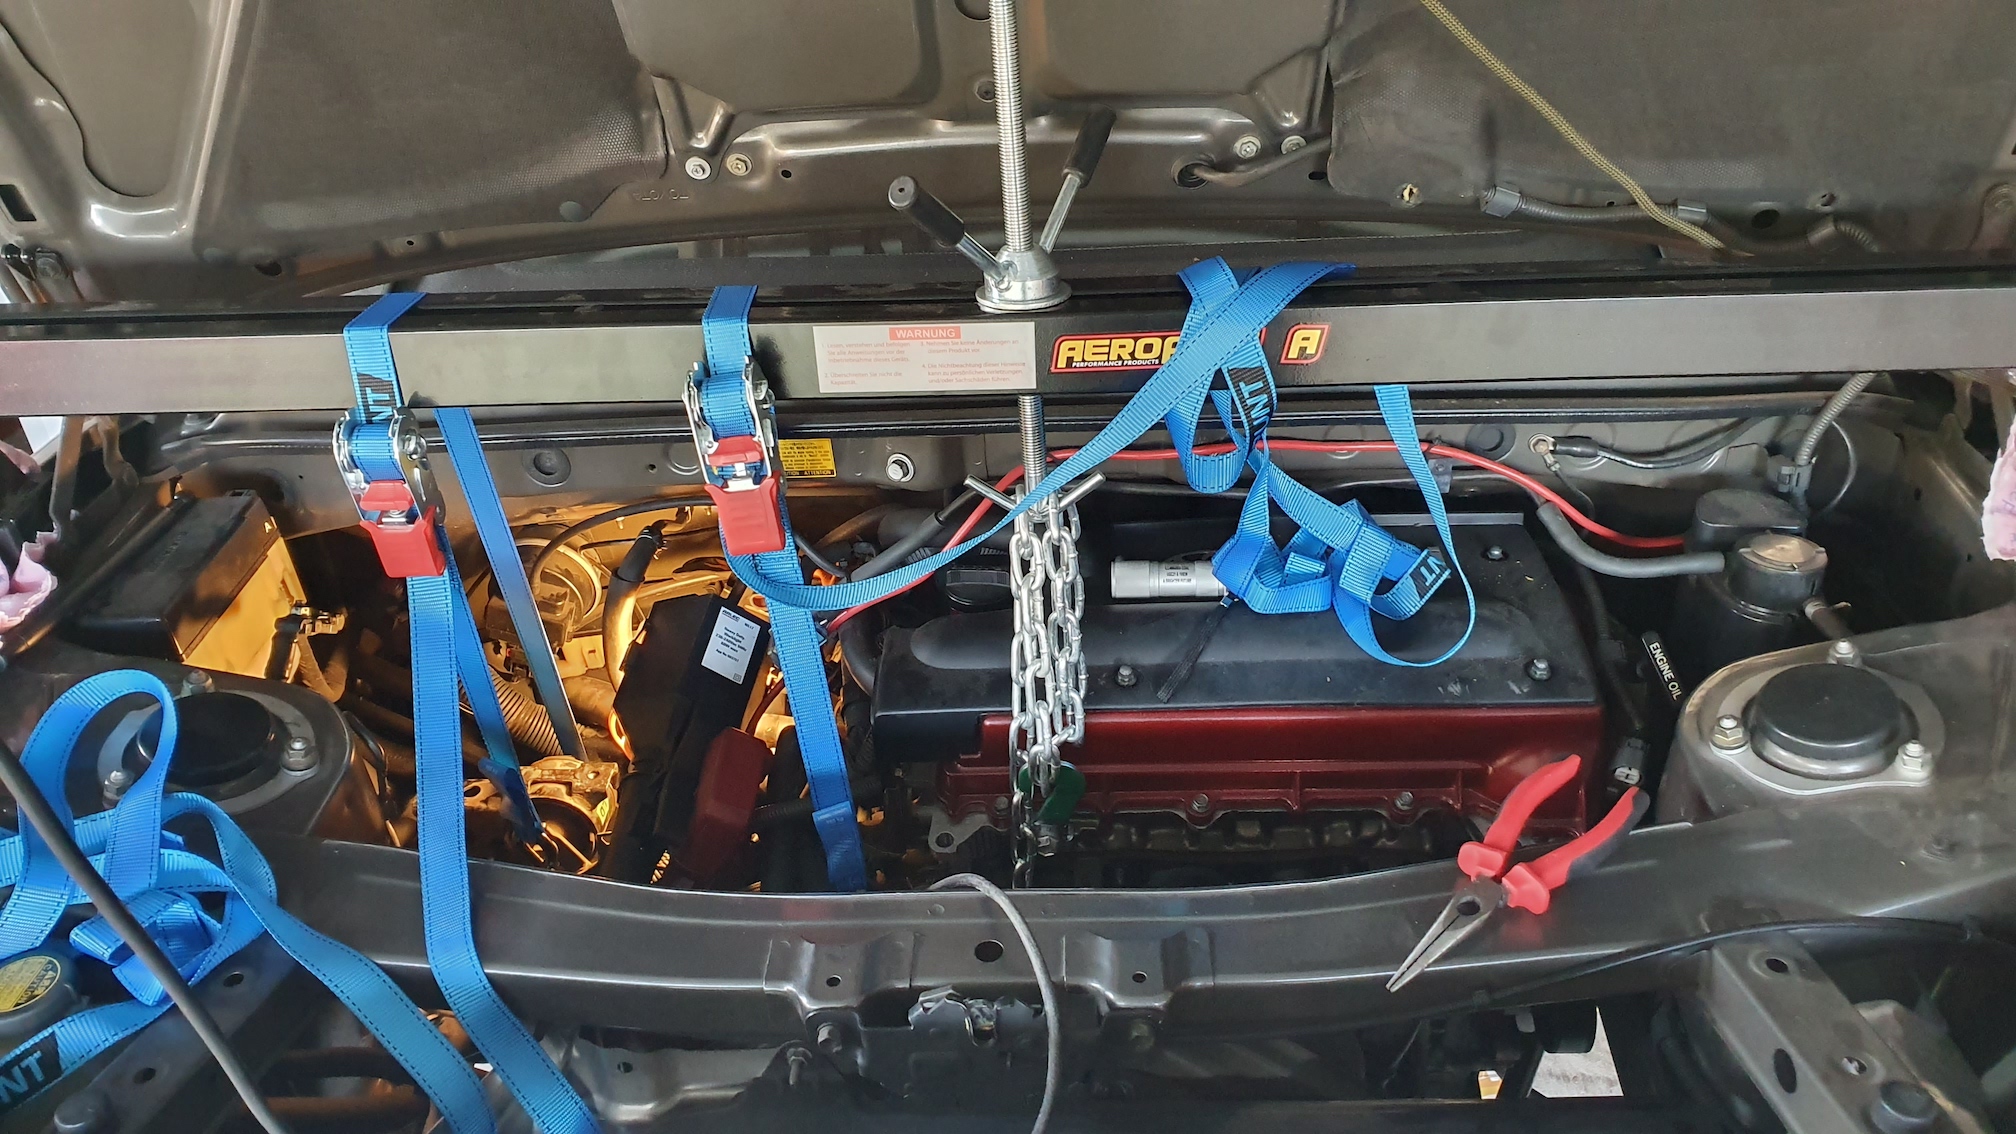
Dropping the transmission is actually relatively straight forward. I used an engine support bar to support the engine and ratchet straps to lower the transmission to the ground. I also got the OEM hook that attaches to the engine to use a lifting point.
I generally followed the guide here except with three variations:
1. I dropped the HPU with the transmission to avoid disconnecting the hydraulic lines
2. There is an additional bracket on later models under the throttle body.
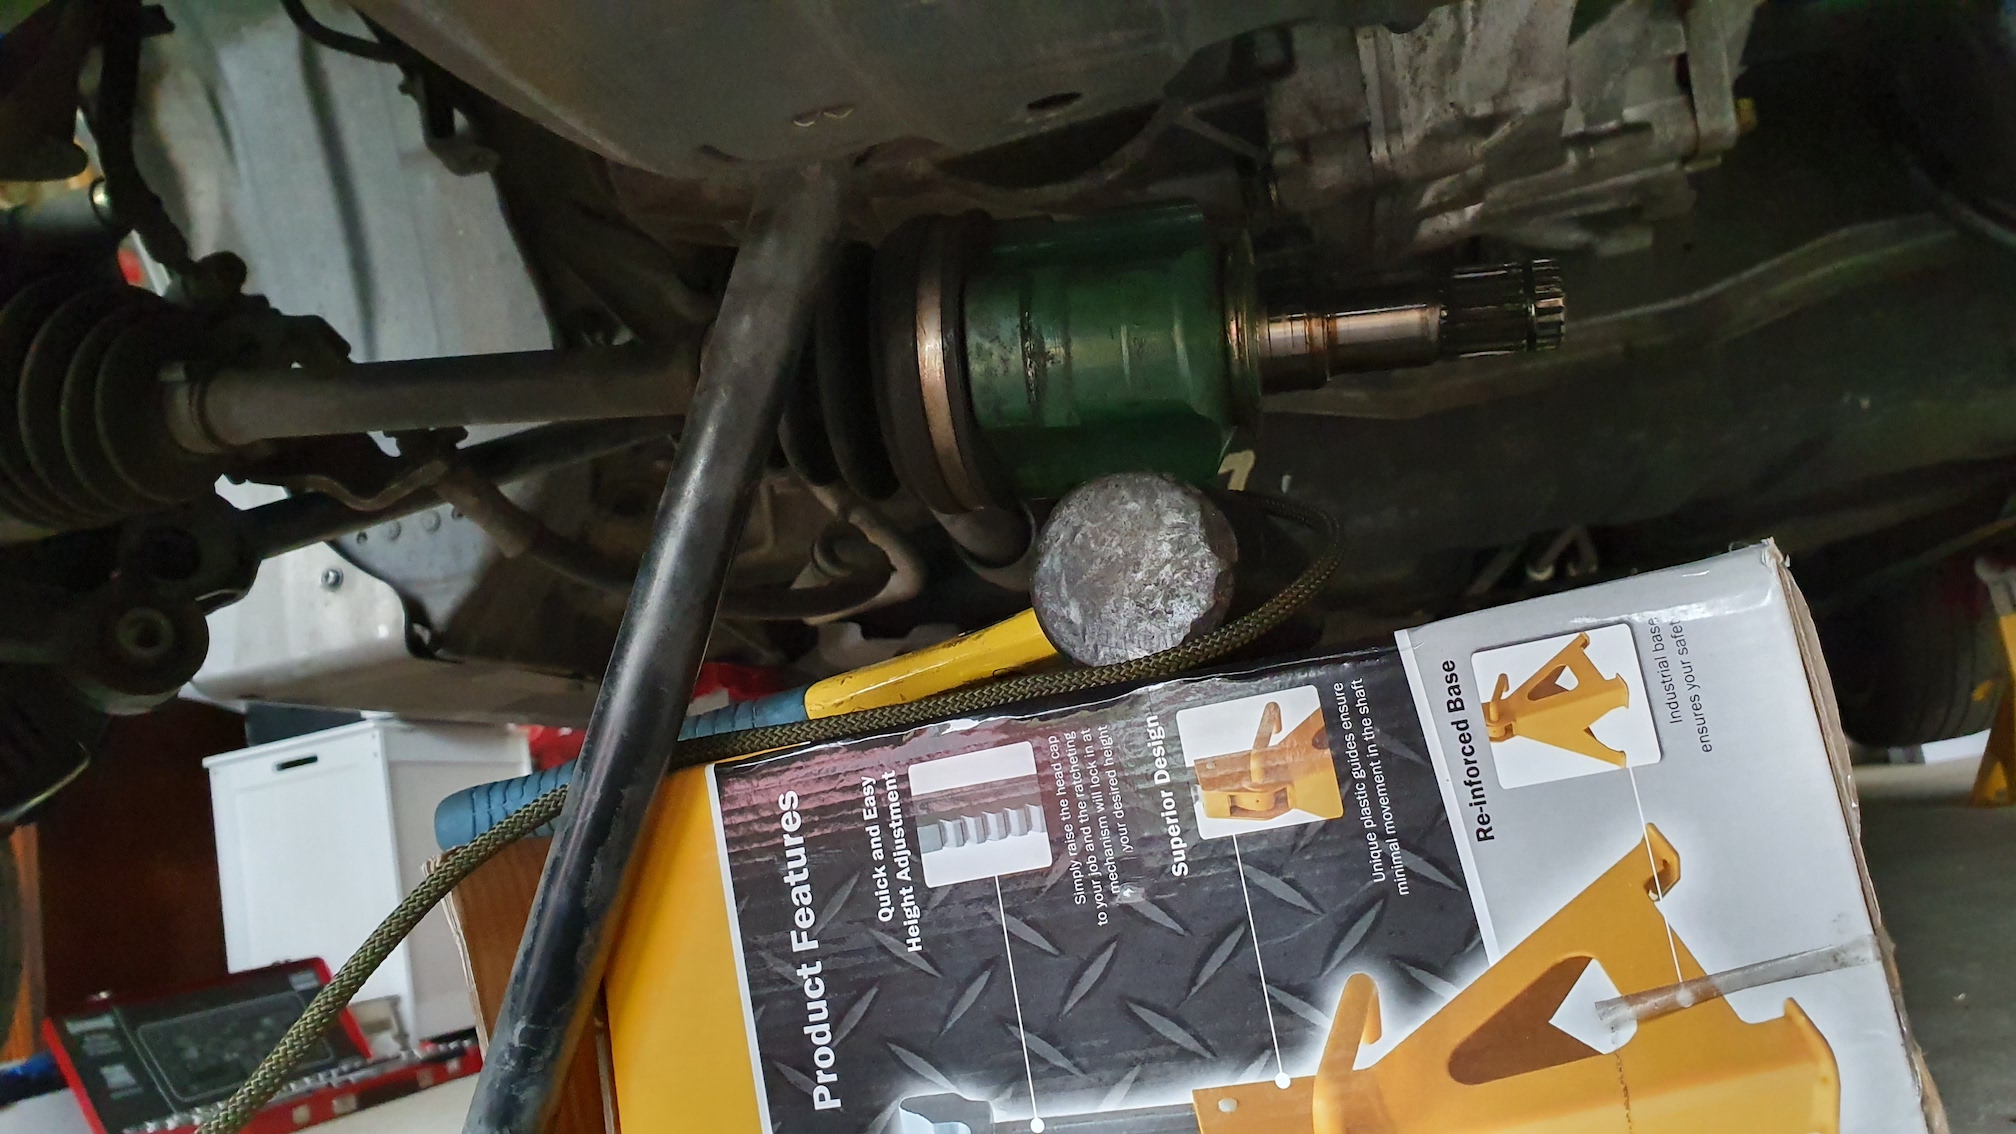
3. I didn't remove the axle nuts, instead I disconnected the rear suspension which meant I had to realign the rear wheels after.
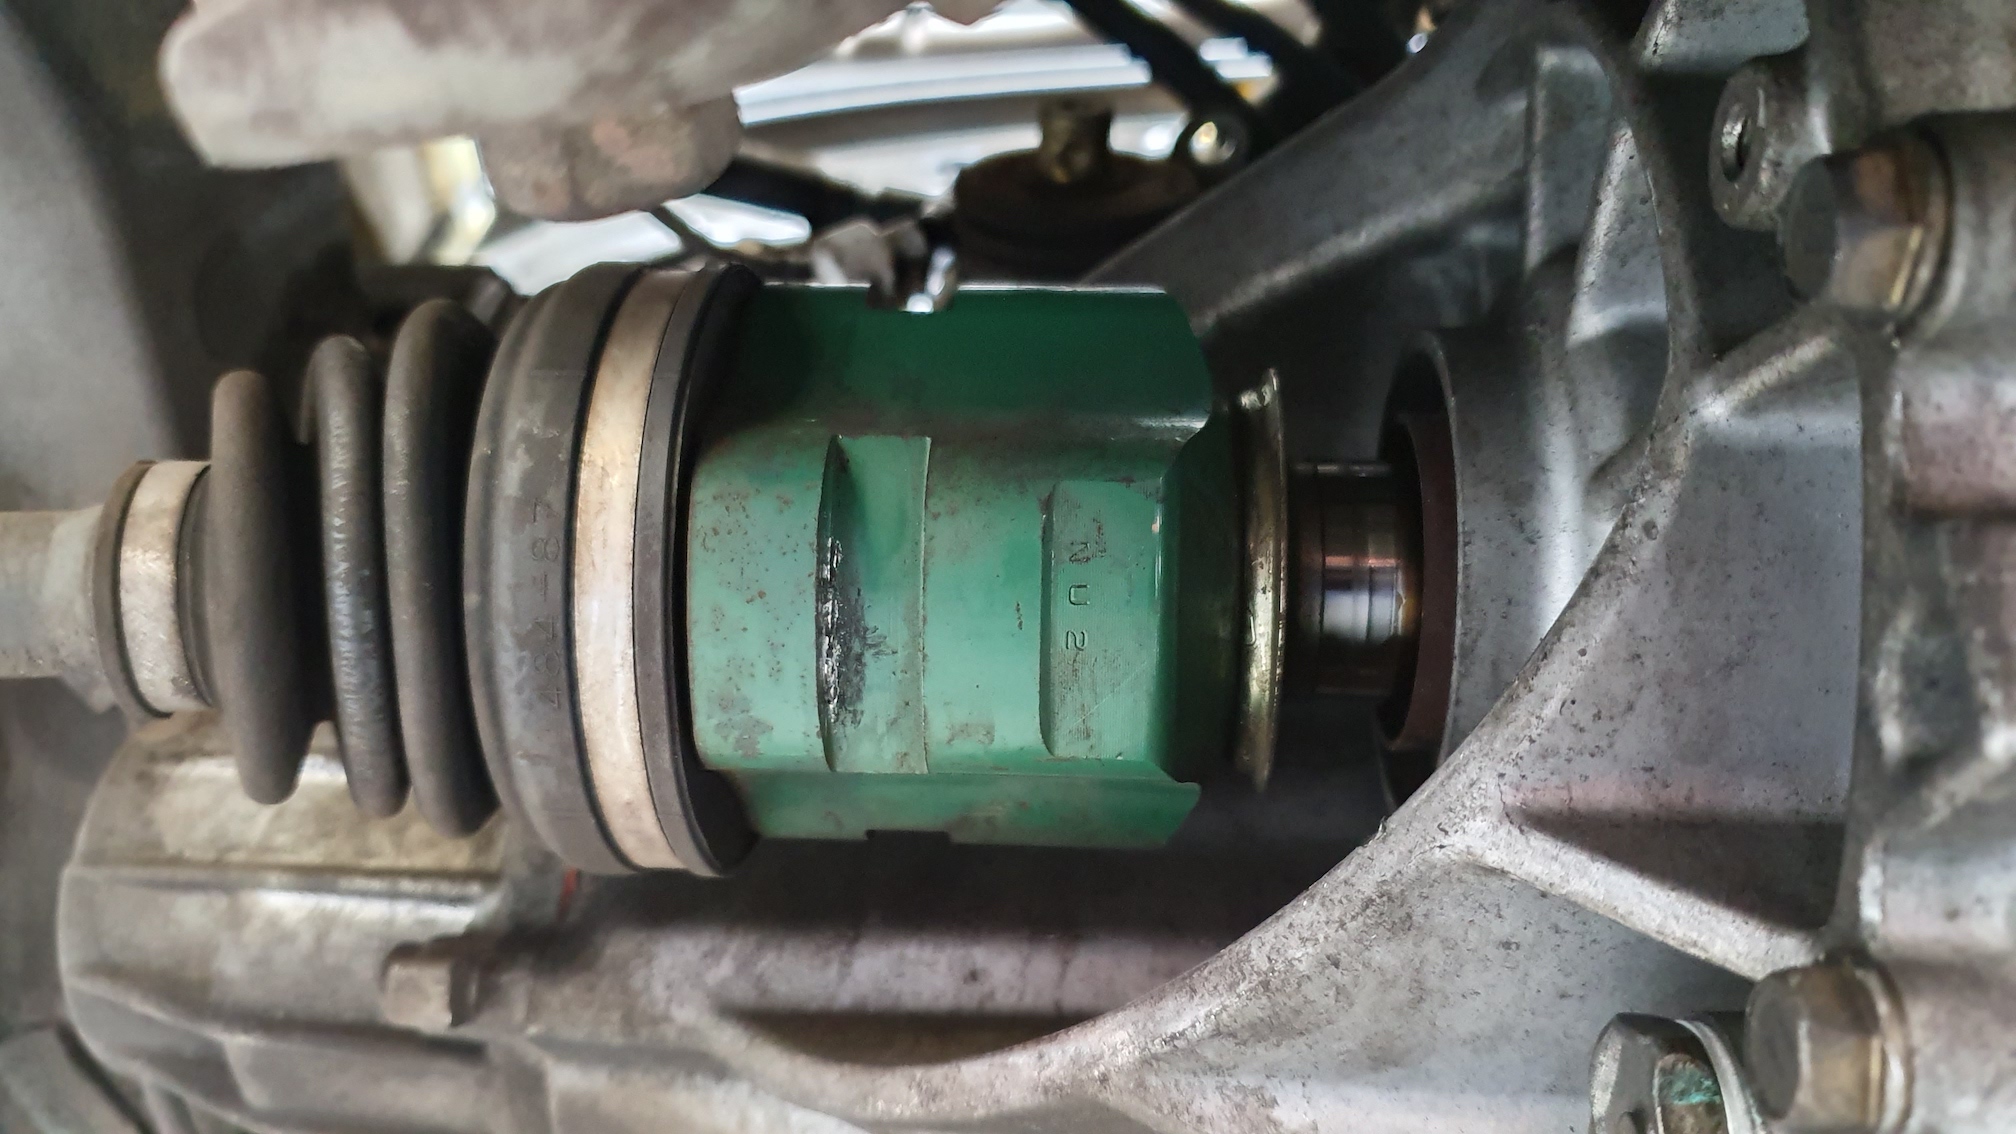
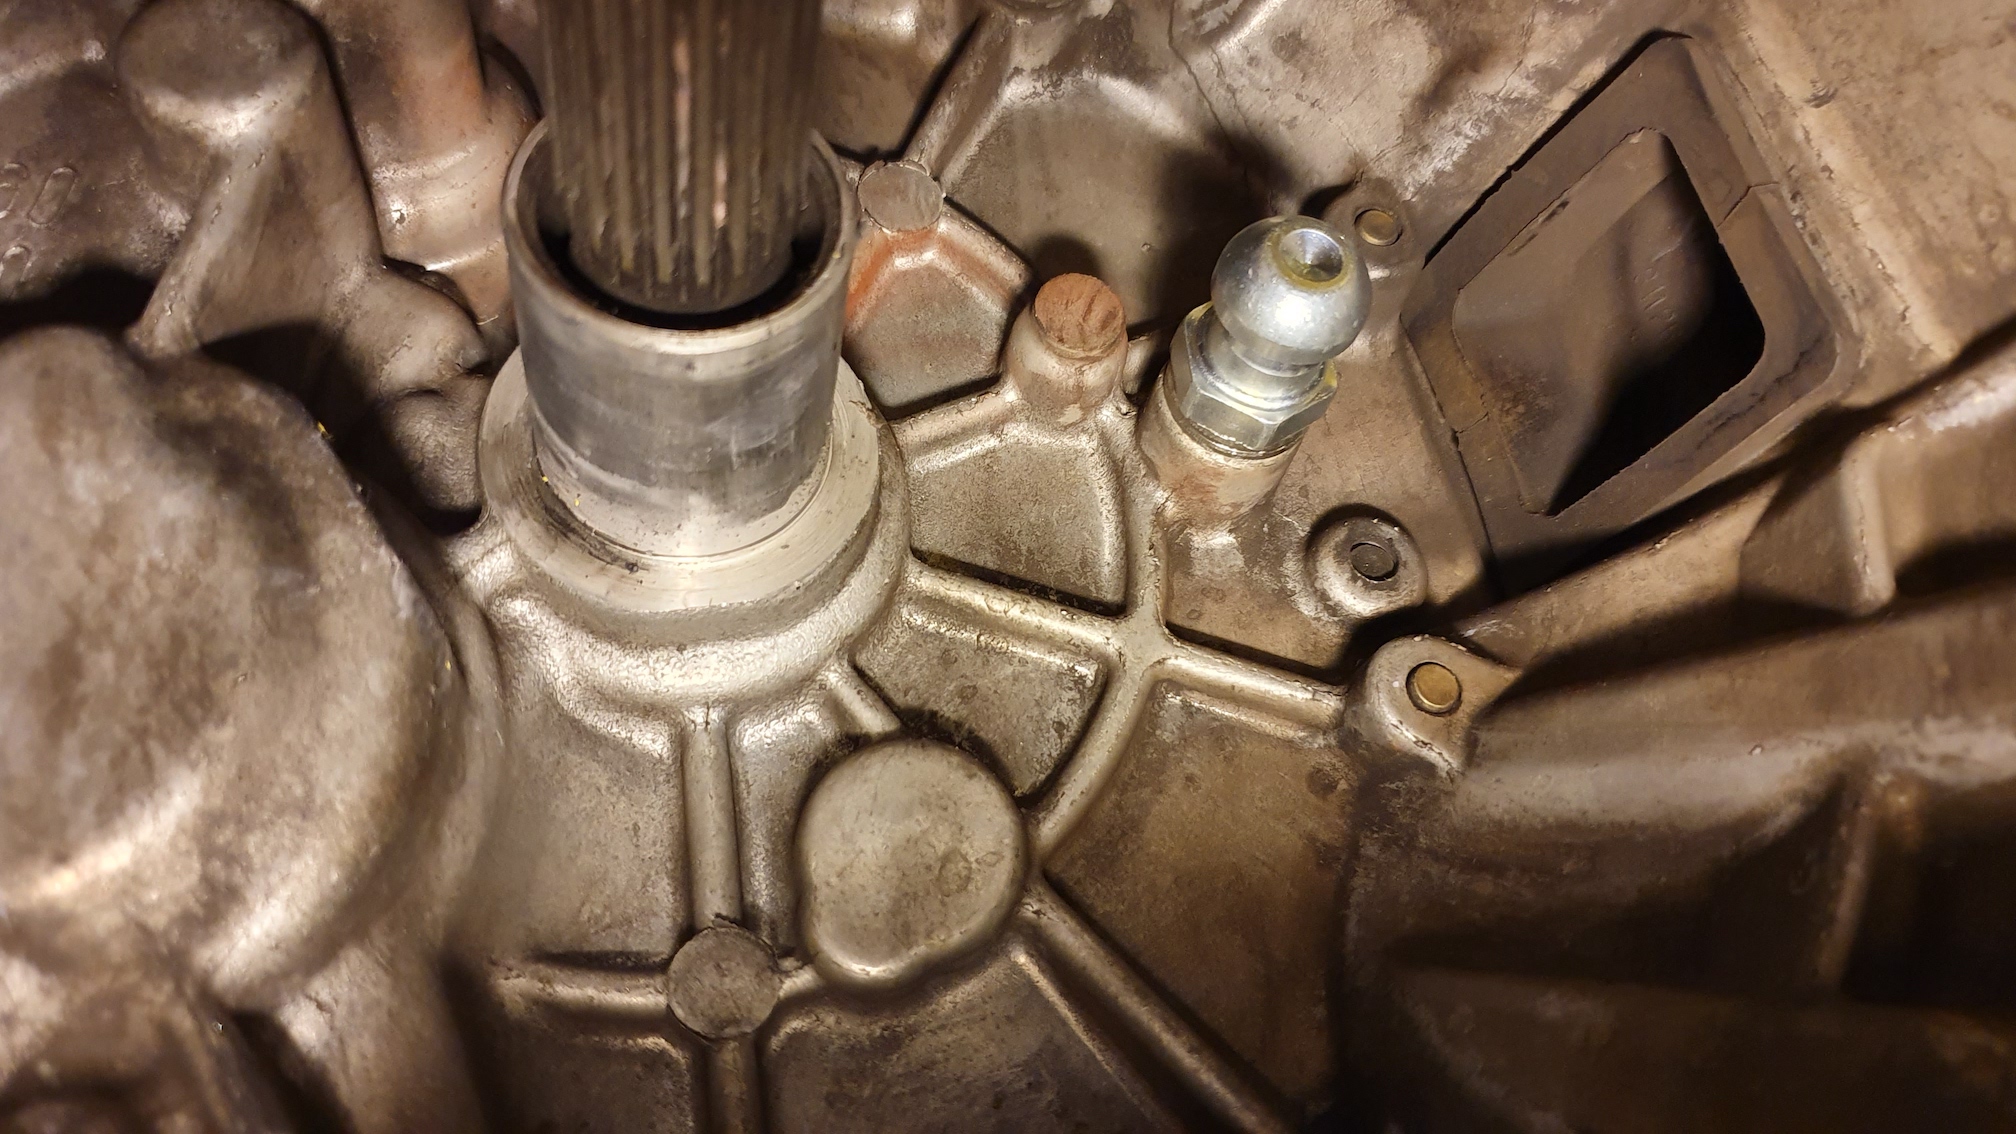
Ensure when removing the axles from the transmission you don't place stress on the CV boots or place them at extreme angles. Otherwise the boot will tear. The left hand axle will require a whack with a hammer and screwdriver to disengage the snap ring.
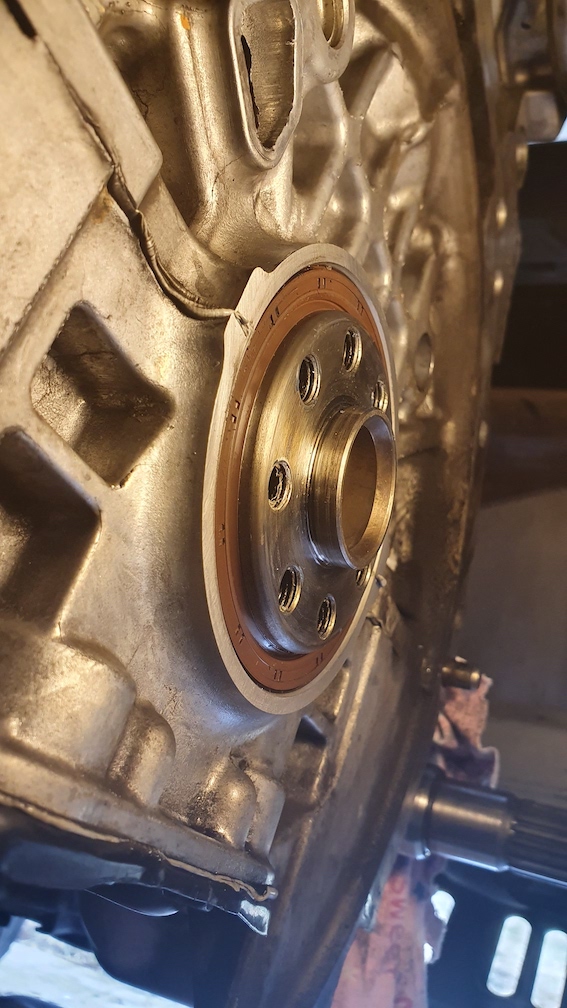
Removing the old rear main seal is a pain and requires a bit of force. Be extremely careful not to scratch the crankshaft. if you do you will get an oil leak and will need to machine the crankshaft to fix it.

Reassembly
I popped the new rear main seal in with a 90mm PVC end cap. Went in perfectly!
Bolted the flywheel to the crank and tightened the bolts as per ARP's instructions. Don't forget to use Loctite 243 to seal and lock the threads.
Putting the clutch on was a little tricky, the alignment tool leaves a plastic piece behind in the crankshaft as the crank doesn't have a pilot bearing. I wasn't happy about that so I just aligned the clutch by feel. Wasn't too hard to do.

Pop off the clutch fork and release bearing. Make note of how shallow your pressure plate fingers are, if they are significantly shallower than stock you will need to shim the pivot stud in order to ensure the fork rests in the same position as OEM. For this clutch I had to use 2x1.75mm thick washers. Don't forget to use high temp grease on the throwout bearing and pivot points on the clutch fork & splines.
Reassembly
If the transmission doesn't mate up to the engine, ensure the wiring harness is out of the way. Once it is lined up it should mate easily to the engine.
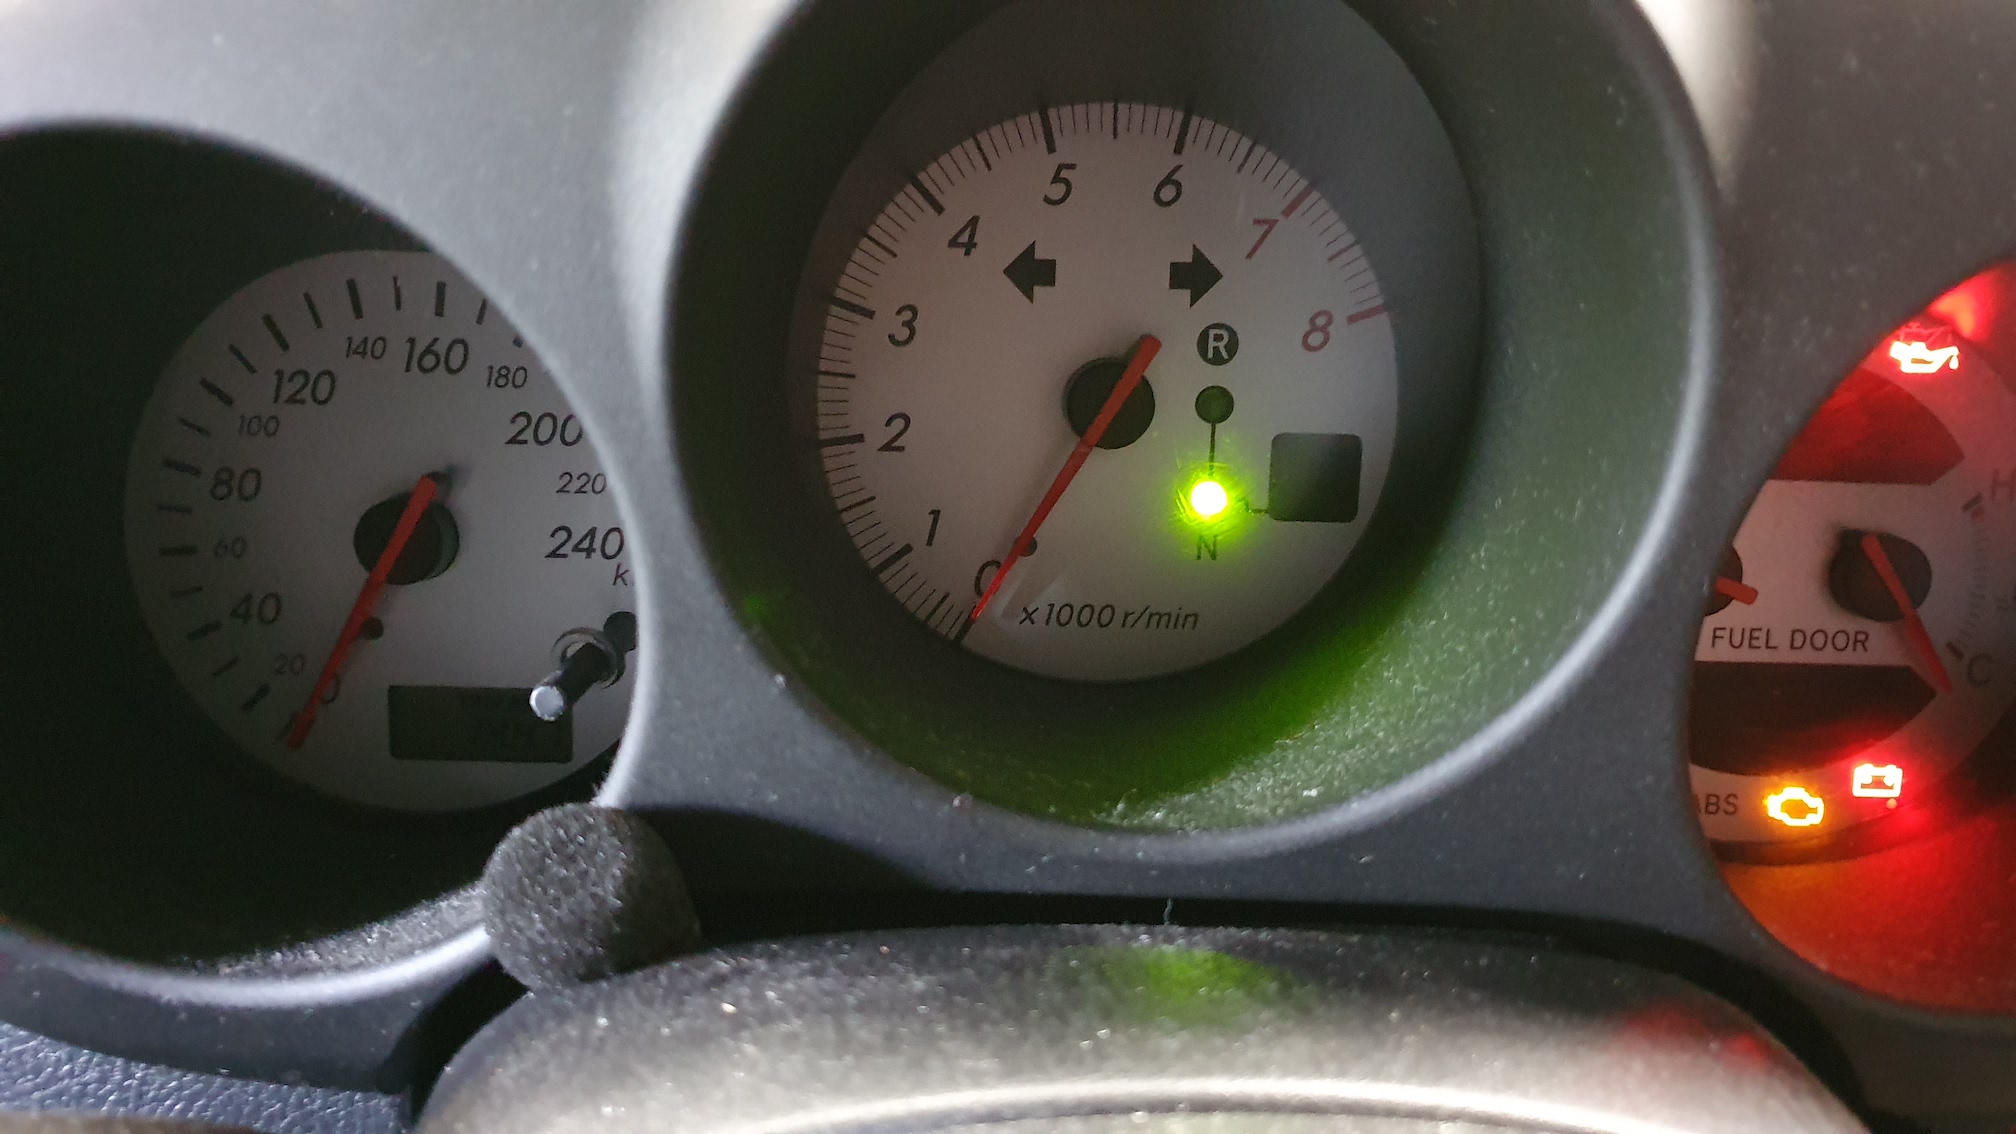
Bring out a laptop with Toyota Techstream installed and initiate a parts exchange relearn. At this point the transmission will relearn the clutch position and gear positions. You may need to rotate a wheel to help the syncros line up. If it gets stuck and you hear the clutch actuate 3 times, then the HPU prime in an endless loop, double check the resting position of the clutch fork. Once it has completed you will get the neutral light on the dash.
Finishing Up
A new clutch and lightweight flywheel has definitely made this car feel brand new and restored permagrin :)